Uncategorized

Augmented and Virtual Reality

Virtual Reality is the use of computer technology to create a simulated environment. Unlike traditional user interfaces (as well as AR), VR places the user inside an experience. They are immersed and able to interact with a 3D space . The main purpose of VR is to “create and enhance an imaginary reality for gaming, entertainment and play” (augment – augment.com). What is the main purpose of AR, however?. Mainly entertainment, like VR. But it does have some official applications in the military, for example it uses an augmented reality to assist men and women making repairs out on the field. As well as this, museums have recently augmented a live view of displays with facts and figures, to add to the experience, instead of reading a plaque or listening to some audio which many find boring. Read more about this recent development at inavateonthenet.net.

They are very similar in a lot of ways. An article published on augment.com tells us that they both “leverage some of the same types of technology, and they each exist to serve the user with an enhanced or enriched experience”. What this essentially means is that they both strive to reach the same goal with their comparable technology. As well as this, both AR and VR have most recently been used as a media entertainment source. Examples include, VR games and experiences and AR mobile applications. This leads developers and companies investing and creating new improvements, adaptations and equipment to release more creative products and apps that support these technologies for the “die-hard” fans. On the subject of innovative and new products, AR and VR could be a groundbreaking new technology in the world of Medicine. They could make remote surgeries a real possibility, as well as the fact they have already been used to treat and help the recovery of PTSD (Post Traumatic Stress Disorder). They do have their differences, though.

The delivery method of these technologies are both different.With assistance from an article by wareable.com, I learned that VR is usually delivered to the user through a head-mounted device or handheld, sometimes both. Oculus Touch being a great example here. On the other hand, Augmented Reality is a lot more accessible to the average consumer. Being used more and more in mobile devices, handhelds and portable equipment. These devices change how the real world looks, combined with digital images and graphic intersect, they create their own small world. Depending on whether you want to be “completely isolated from the real world while immersed in a world that is completely fabricated” (techtimes.com) Or in touch with the real world while interacting with virtual objects through a phone, you will have to decide which one is for you.

In conclusion, VR and AR are completely different things. One being more accessible to the average user, and the other being for the more hardcore fan. Both are incredibly unique and fun experiences and have their own uses outside of entertainment, like Medicine. You cannot really compare the two, and have a clear winner as they are both built for different purposes, but, I personally, prefer VR. This is because it offers such a unique and eye-opening experience and can have many more uses in the real world over AR.
This slideshow requires JavaScript.

Visual Effects for Synoptic Project & Behind the Scenes

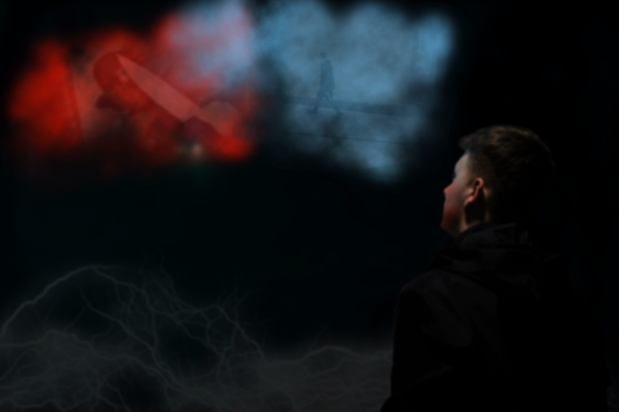
As part of our synoptic project, I am required to design and create some FX for specific scenes. This particular effect, seen below, are clouds of memories that the main protagonist, red being a bad memory, blue being a good one. Memory Clouds.png

Creating the Effect

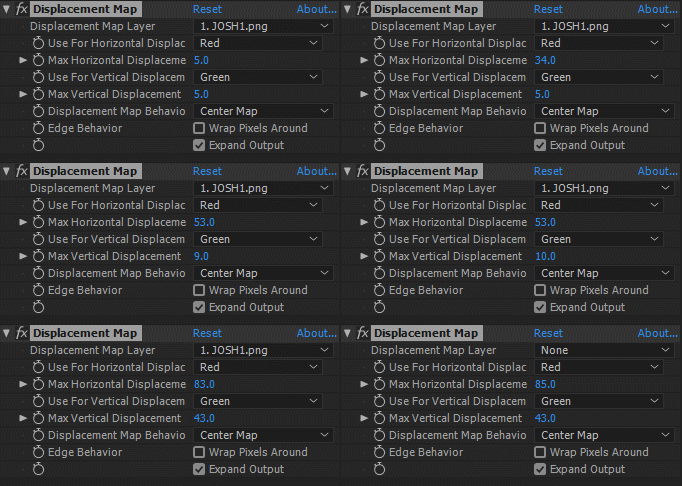
This is the footage that I used in the background to create the “Cloud” effect. To create this, I downloaded a stock image of a cloud and took it into After Effects. It was relatively simple. All I had to do was add a displacement map, and animate the horizontal and vertical displacement. After finalising the animation, I had to add some colour effects to have the transition between blue and red (which at the time, I thought was how the effect would be made). A simple color offset effect worked a treat.

GIF

An example of changing the values


As well as doing some of the effects, I have taken the task of editing the behind the scenes videos for the team. Instead of having a concept art book like other teams, we have behind the scenes videos and a VFX breakdown at the end. Our behind the scenes videos feature small sections of cut footage, photos, and a general look at what happens behind the camera and making of a short film. I have completed two behind the scenes videos so far, with another one in the works as we speak. Here is the first one I made, which is a culmination of Day 2 of filming and some practice shots with the drama students:

I took this task because editing and film-making is one of the things that I like the most, this will be what I pursue once I finish this course. I have been enjoying getting used to new software, as well as using new techniques and effects to make a professional and clean look to my work. If I was to create this video again, I would maybe use calmer music and a cleaner font. I do not want to give off a false impression with my work.

Unity: Particle Effects & Synoptic

The Particle System

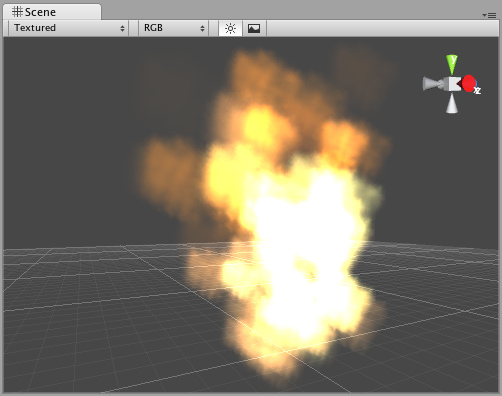
In Unity, a particle system component simulates fluid entities such as liquids, clouds and flames. It does this by generating and animating large numbers of small 2D images in the scene. Particles are small, simple images that are displayed and moved in large numbers by the particle system. Using a smoke cloud as an example, each particle would have a tiny texture to recreate smoke, resembling a tiny cloud. Many of these tiny particles piled together, the overall effect is changed to a larger cloud.

particle20systems-0

An example of something created in the particle system

Synoptic Project Particle Effects

For one of the projects I am working on, which is a game, I am required to give my VFX related input in the form of of particle effects. This involves engines and projectiles.

To start off, I had to learn the basics of the particle system, as I had never used it before. The menu did look quite shocking at first glance, but after using it for a while (and following a handy guide), I got to grasps with most of it.

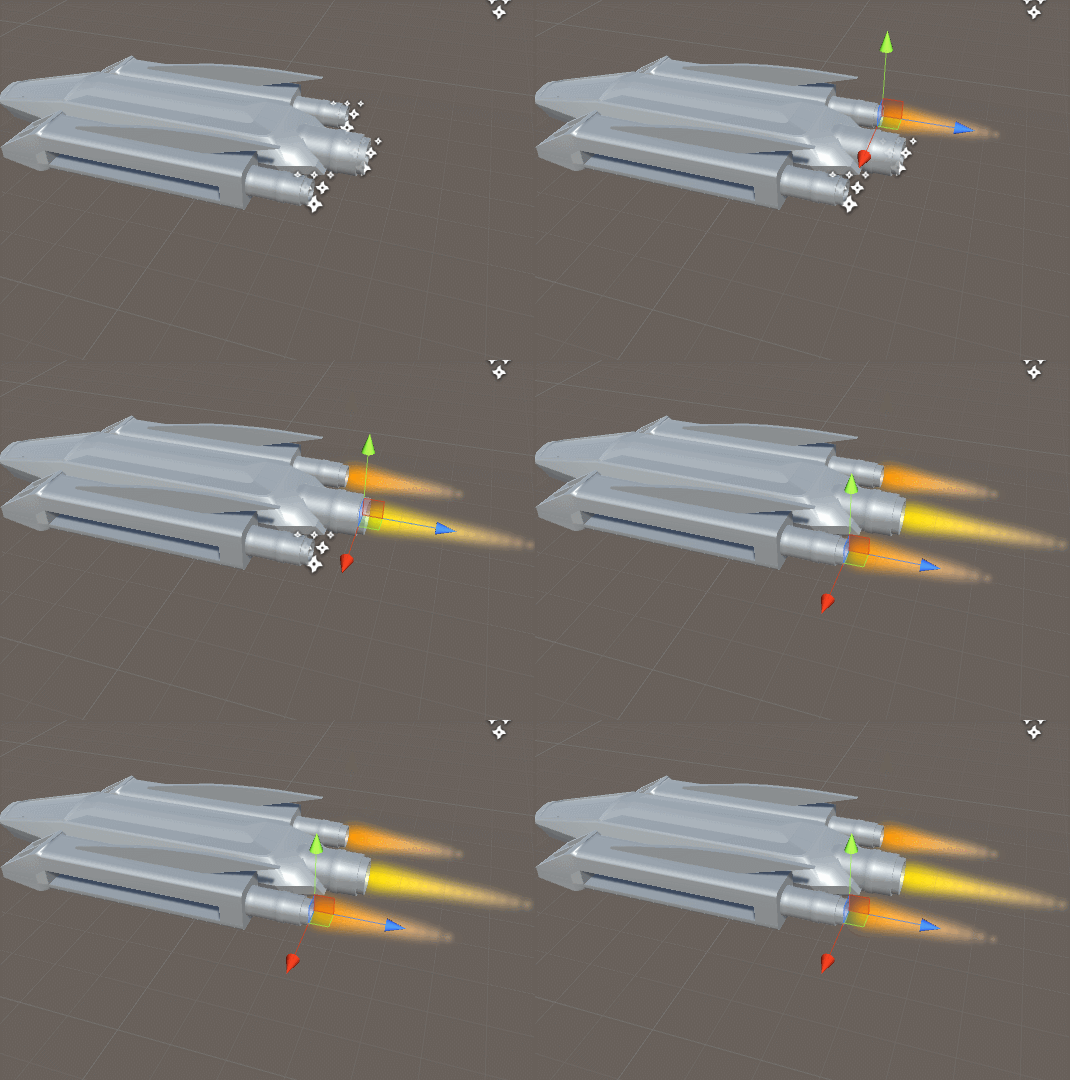
Using a model from the game, I created some simple engine effects to be used in the final version.

GIF

I am quite proud of these effects after never using this system before. In the final game, they will adjust to the speed of the player.


Synoptic Project: Update

Last time I blogged about the synoptic project, it was addressing:

  • Weekly Timetable
  • Short Film Inspirations
  • Music Inspirations

Since then, we have progressed substantially. We have:

  • Completed half of the Pre-Vis’
  • Completed Risk Assessment
  • Added more music to the examples playlist
  • Completed various visual effects tests
  • Concept Art
  • Started Pre-Vis Compilation
  • Started VFX Tests Compilation

Pre-Vis

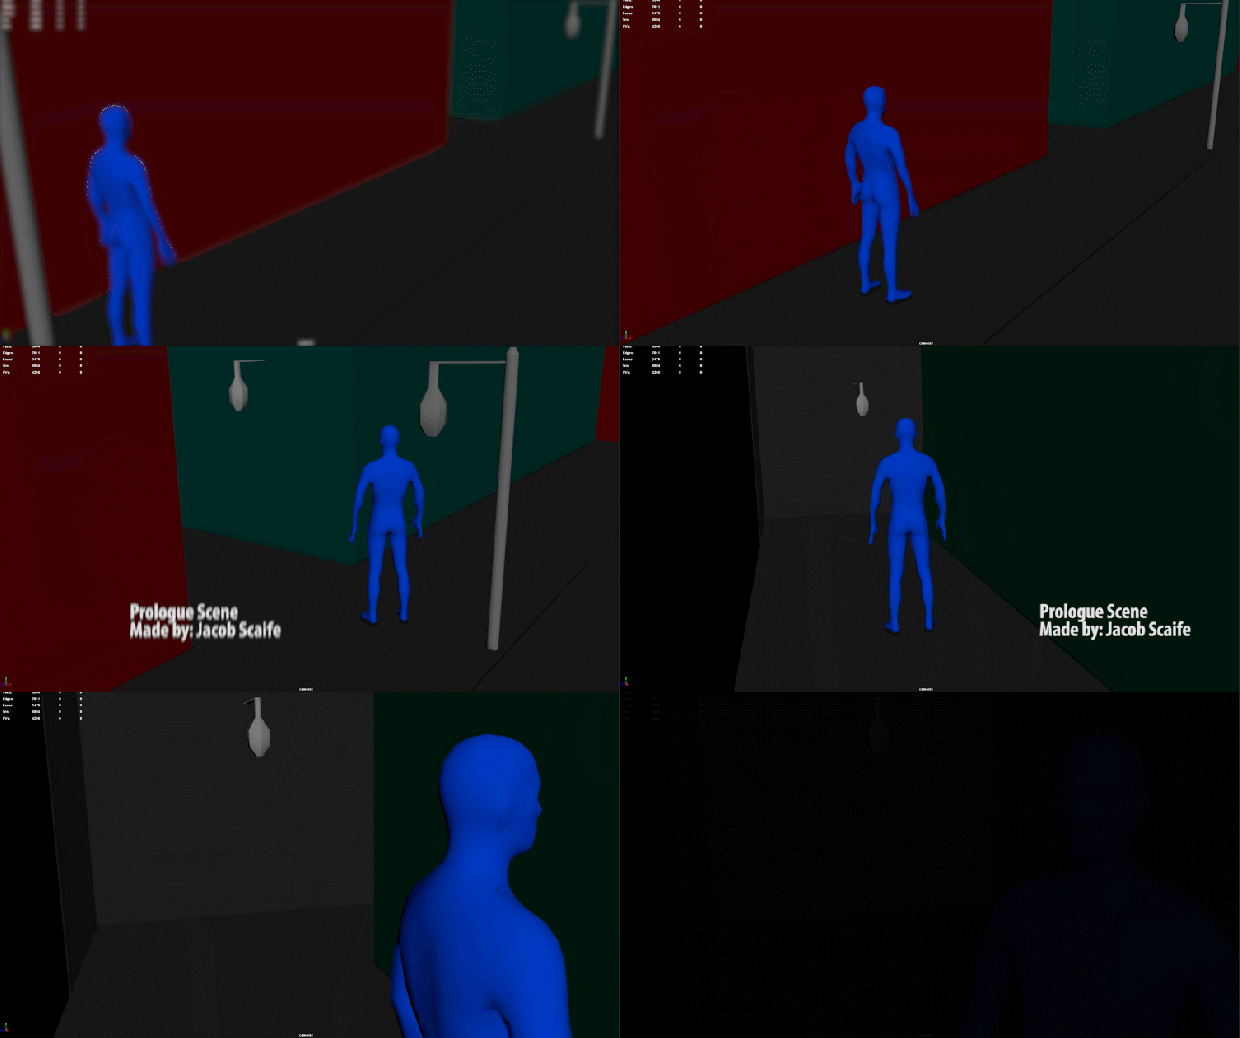
So far, we have completed the Pre-Vis’ for the prologue, Act 4, and Act 3. All of which are in an upcoming compilation to be added to our showcase portfolio, and final work document. Here are two of them:

Prologue – Created by Myself

Act 4 – Created by Josh

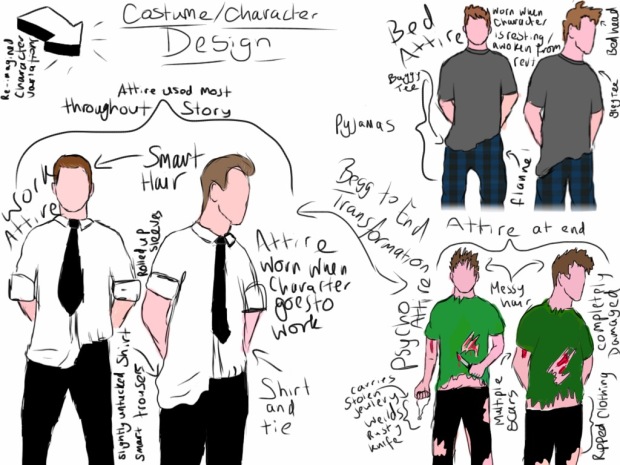
As well as this, the main character design was made by our Director/Supervisor, Josh.

costumecharacter-design

VFX Tests

VFX Tests are to practice/recreate effects we will use in the final product. To see if they look good, suit the theme, and make sure we are able to recreate them. Some of the most simple effects are transition slides, such as the “2 Days Later” test. This is very easy to recreate and took almost no time, just a simple text animation.

This was a practice effect I made for the credits. On the right hand side of the screen there is rendered, and textured 3D models to recreate items of significant interest in the short. On the left, is the credits.

Sticking with the 3D, this test was designed to be played after the prologue. It would then proceed to fade to Act 1. The text was created in Maya, and animated with a camera.

This next effect was created in After Effects by Bethany. It shows a realistic glowing eye effect than can be easily recreated for the final product.

Finally, similiar to the text effect in the short film “On My Way” is an iPhone message effect.

In Progress

I am currently in the progress of creating a compilation of all of the tests and pre-vis’. I am making these in Adobe Premiere. Here is a preview, (it is quite slow because it is a GIF file):

gif


High Poly Model & Bake

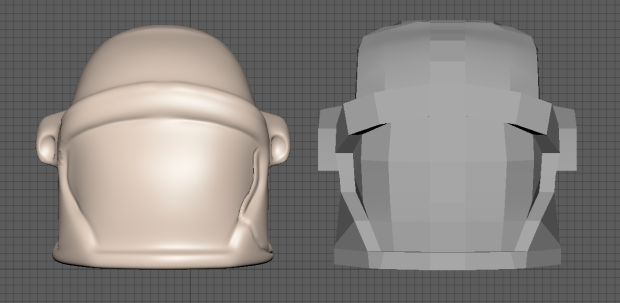
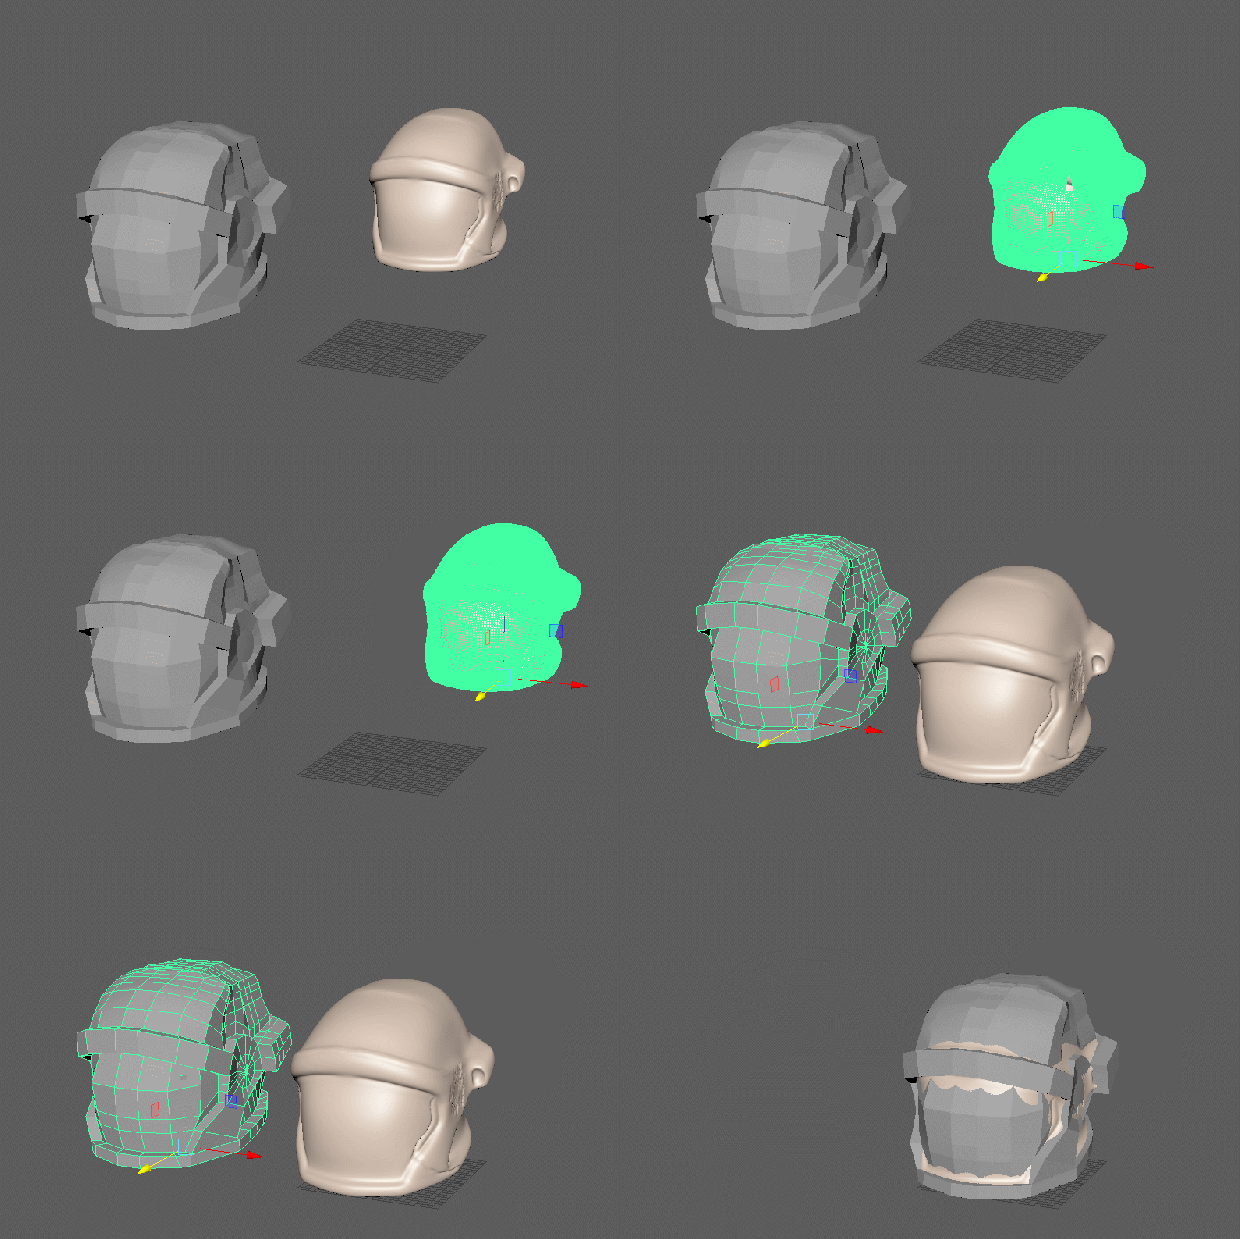
I recently took my low poly helmet model, seen below, into Mudbox. This is a program built for 3D sculpting. It also allows you to create detailed additions to your model, as well as adding subdivision levels to increase overall detail. As you can see below both of the models side by side.

capture

High Poly and Low Poly Helmet

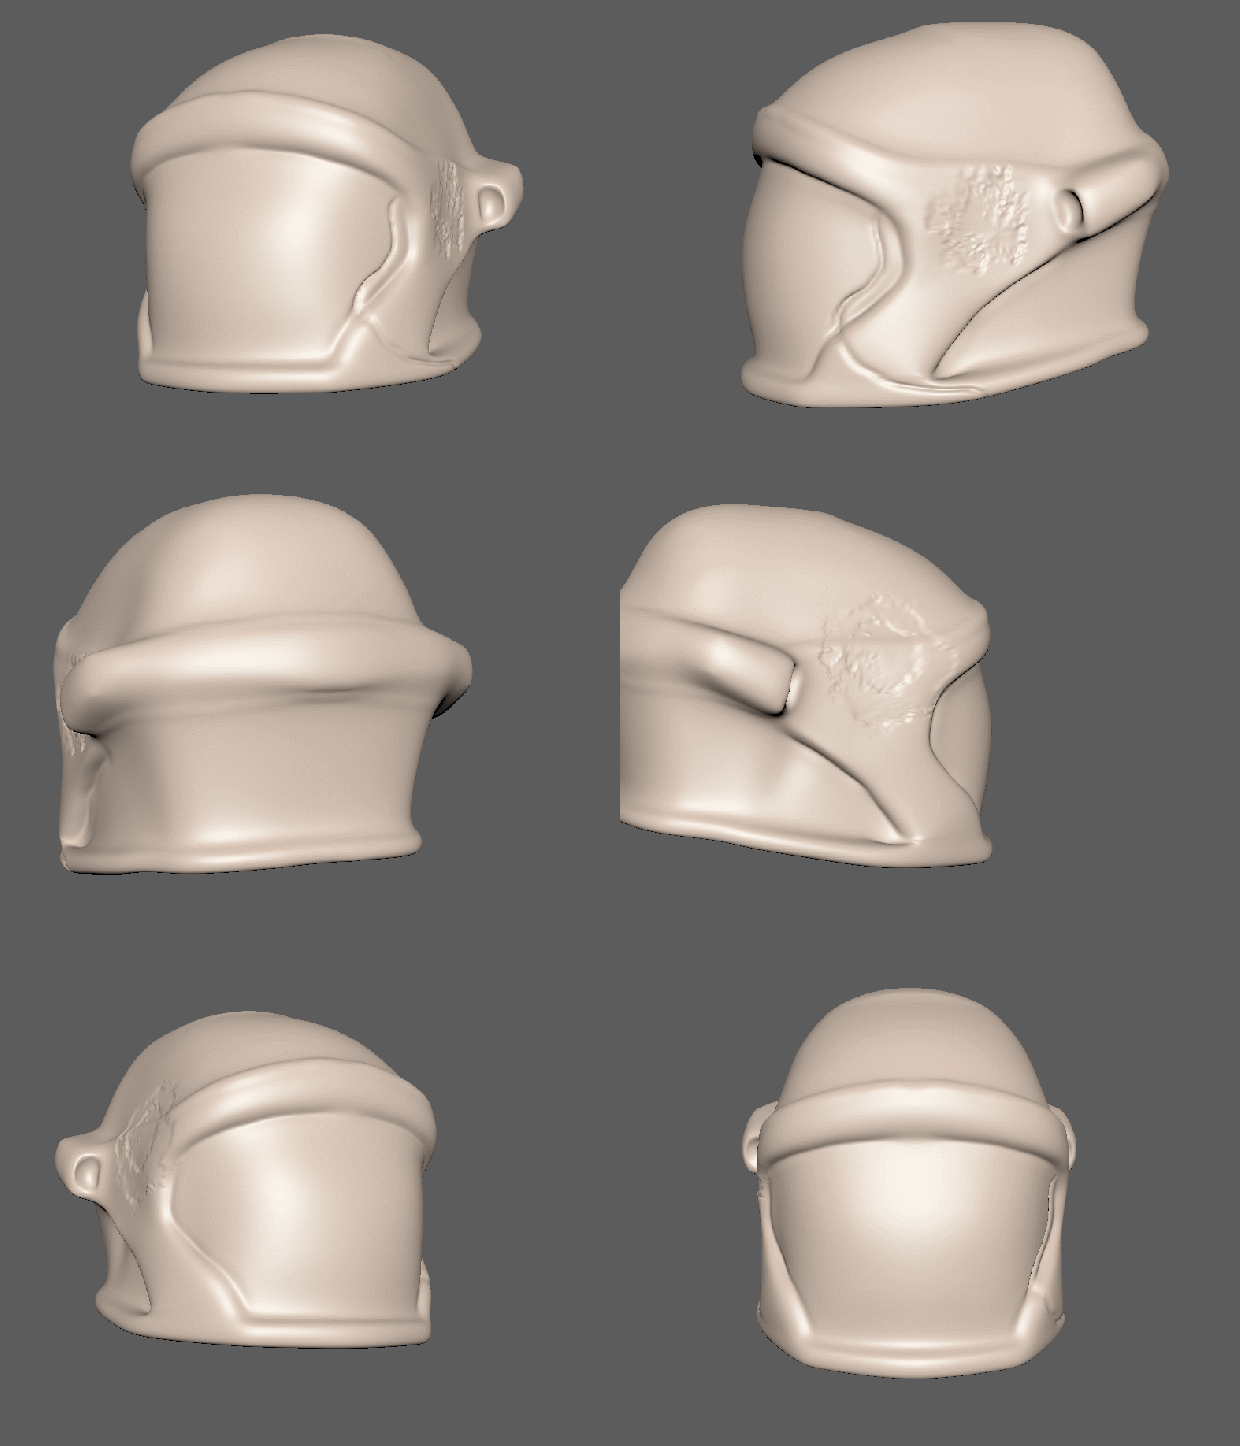
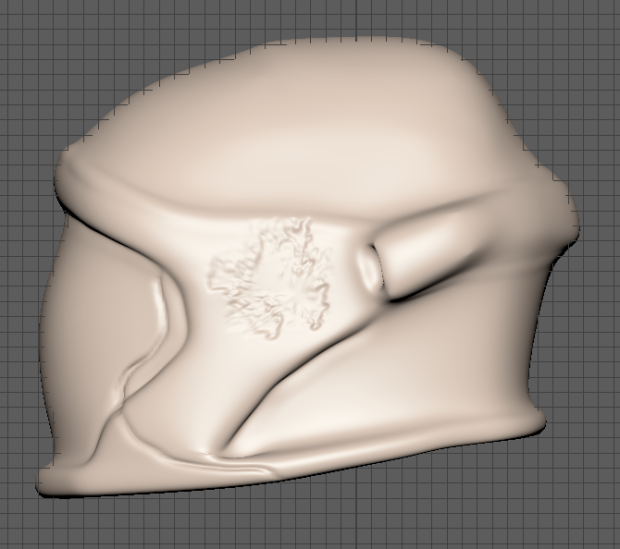
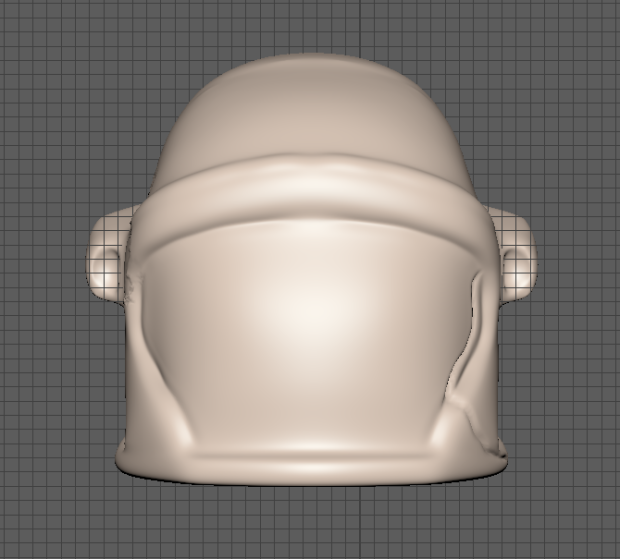
When I was editing the high poly model I had to add in some extra details, for example, scratches and a few scars.  This was so the normal map could use this to create the map to onto the low poly model. It also makes it look better.

High Poly Model

gif

GIF Overview


capture

Side View


capture

Front View

Baking

“Baking is the process whereby you “bake” all the textures applied to the surface into an image that you can then apply as a texture. This is most useful when baking a high-poly surface texture onto a low-poly model. Which is what we will be doing.” – Blog Post

To prepare a bake, you need to have both of your models in the same environment. High and low poly. Then, set their positions to (0,0,0). This means they are at the centre point and are on top of each other (which is what we want).

gif

Moving both objects to (0,0,0)

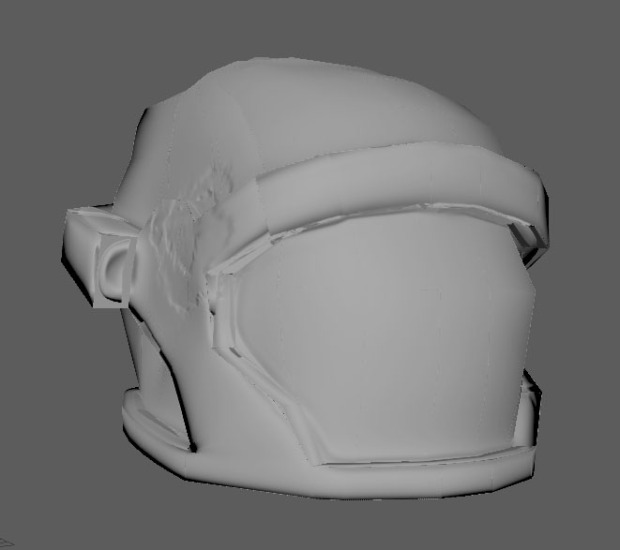
After this, we set the file location we recieve the normal map through, and adjust the envolope. This is the area that Maya needs to check for the source mesh (High Poly), to bake onto the target mesh (low poly). It must exceed the boundaries of both models. If the envelop is big, then it will take a long time to bake. But if it is a reasonable size then it will take around 5-15 minutes. Here is a bake I created earlier:

capture

It turned out relatively well. The only errors are occuring where there are polygons missing so the map cannot recreate it using a simple texture file. Other than that, I think it looks good.


Modelling Progress: Helmet

As explained in previous blog posts, we began a 9-week modelling project to create a low poly model. With this low poly model, we would UV unwrap it, create a high poly version separate to the low poly, and eventually bake it down.

What is baking?

Baking is the process whereby you “bake” all the textures applied to the surface into an image that you can then apply as a texture. This is most useful when baking a high-poly surface texture onto a low-poly model. Which is what we will be doing.

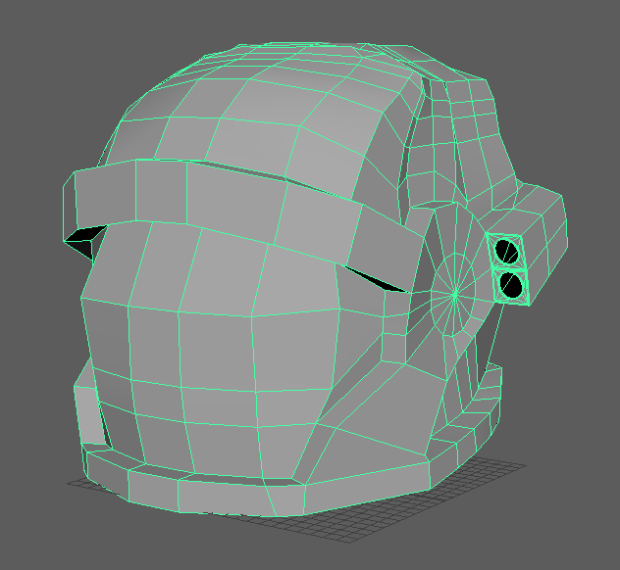
Low Poly Model

capture

This is my low poly model so far. Hopefully it should be simple to tell that this is an astronaut helmet, if not now, it will later with textures and a higher poly count.

Finishing Touches to Low Poly

To finish the low poly, I will have to make sure there is no geometry errors, like no manifold, or overlapping faces/vertices. As well as this, I could add in some extra edge loops to make the geometry.

UV Unwrapped

I have succesfully UV unwrapped my model. It took around 2-3 hours, doing it carefully. After unwrapping the model, you have to add a checkerboard texture to correctly scale each UV properly. Here is what it looks like:

capture

As you can probably see, some of the edges have a thicker outline. This is because I have creased them and made them into hard edges. Applying creases to edges modifies the mesh, so you can create shapes that transition between hard and smooth. Without increasing the base mesh’ resolution.


Keying in After Effects

Keying is “defining transparency by a particular colour value or luminance value in an image.When you key out a value, all pixels that have colours or values similar to that value become transparent“.  – Adobe

In other words, if you key  out a colour, that colour will be deleted from the scene. Many movies have used this, as it is mostly used to “edit out” greenscreens. Here are some examples:

  • The Avengers
  • Captain America
  • District 9
  • Alice in Wonderland
  • Avatar

What did we do?

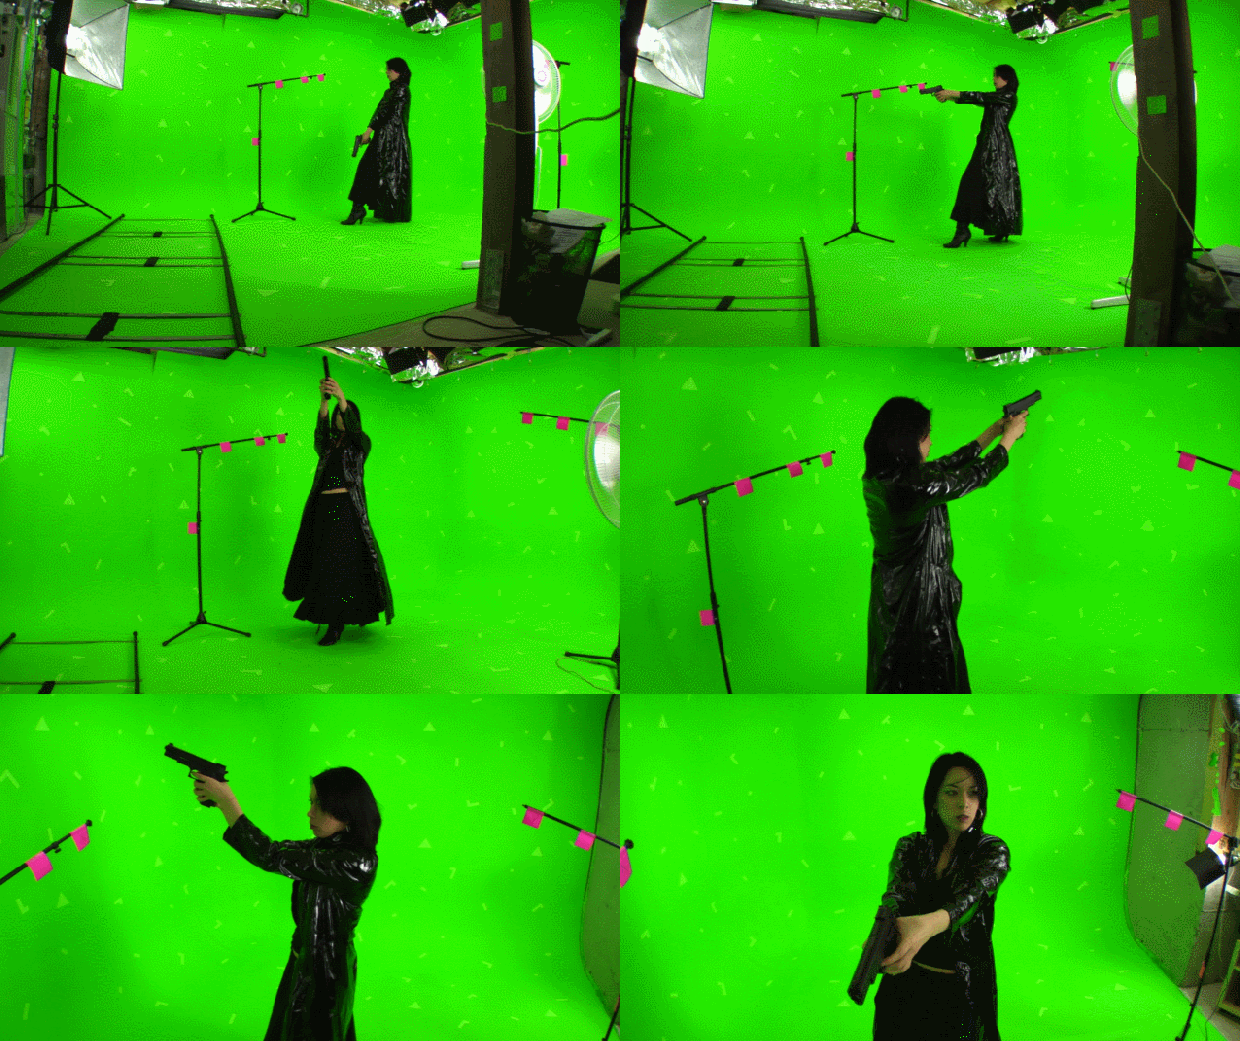
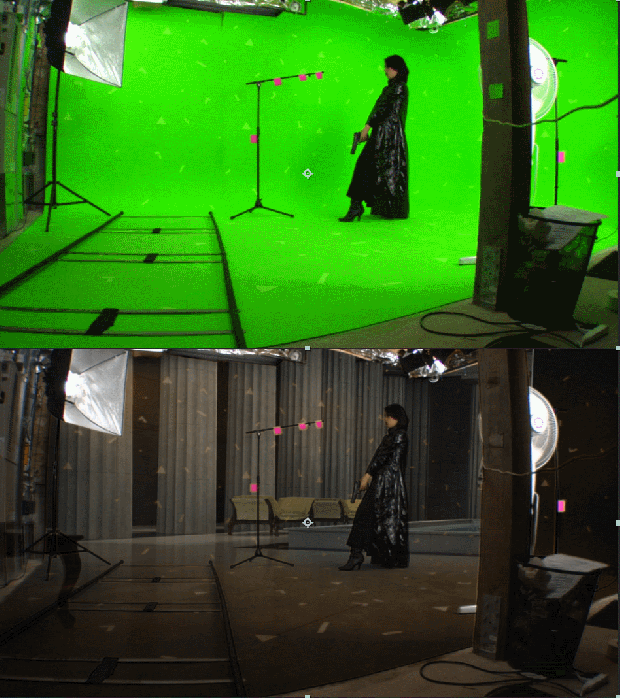
We had a video of a woman with a greenscreen, and a 3d animation. Our goal was to take the woman and place her into this enviroment, without the greenscreen and aperatus. To do this, we would use Keylight.

What is Keylight?

Keylight is The Foundry’s keying software. It was bundled with the release of  After Effects 6.0. It is an award winning blue and greenscreen keyer.  The main algorithm that Keylight uses was developed by “Computer Film Company” and was ported to After Effects by The Foundry.  The Foundry is also well known for other high-quality plugins.

The Greenscreen Footage

gif

3D Scene Footage

gif

Keying

To key out the greenscreen we have to use Keylight. This allows us to take out the green. Here is what happens when we take out the green:

gif

To fully key out the shading and shapes in the video we need to go into screen matte view, which is black and white. White shows the areas that have not been keyed out, black represents the keyed out parts. We need to turn up the “Clip Black and Clip White” options to get the full effect.

Here is the final effect, only keying out the green:

gif


VFX Tests for Synoptic Project

Today I decided to create some basic effects that we would use in our synoptic project. The ones I decided to focus on were a simple fade to black with some text, and an eye colour effect.

Text Effect

For one scene in our project, a film sequence fades into a black screen with some text. It had to be subtle, and simple. This wasn’t too difficult to create, just animating the opacity would do the job. Here is the finished product:

Glitch & Eye Colour Effect

In one of our scenes, a suspicious man lifts his head revealing yellow eyes, to show his dark side. To recreate this, I used two main effects. One using distortion layers, which I also used in this project (that explains it further), and masks.


Synoptic Project Update

This post is just a quick update concerning the synoptic project. Detailing what is new with the work, and what we plan on doing in the near future.

What’s new?

Weekly Timetable

There are 2 next gen year 2 groups, and our synoptic project group contains people from each class. This called for a timetable to be made so we could work on our project as efficiently as possible. This may mean staying back after college hours, but if it gets the job done, it is worth it. It also means we have alot of extra time to focus on our group project, which means it could be even better.

capture

As you can see above, we use the word “scrum”. This refers to a daily scrum, (also known as a “stand up meeting”). This is a weekly meeting in which attendees participate in a group meeting while standing. This is intended to keep the meetings short and sweet as standing up for long periods can lead to discomfort, which nobody wants.

Short Film Inspirations

A member of our group, Josh, created a small document containing some links to short films we could use as inspirations. In terms of, effect usage, tone, colour grading and cinematography. As we are all new to creating short films, this would be a great tool to have. Some of these inspirations included:

On My Way

  • Approximately the length of our VFX sequence
  • The text message effect could come in handy for an intro scene

Friend Request

  • Creepy tone/vibe
  • Simple effects, realistic
  • Colour grading is very good

I See You II

  • Student work
  • Good length
  • Grading is good
  • Great use of effects

Music and Sound Inspirations

One of my jobs for pre-production was to gather examples for music and sound effects we could give the music students as an example to what we would like them to create. I found many tracks, but shortened the list down to 4. Including:

Gravity OST – Main Theme

  • Solemn
  • Calm
  • Soothing
  • Use in quiet scenes

Immediate Music – Mastermind 

  • Powerful
  • Suspenseful
  • Strong Vibe
  • Tense


Synoptic Project – Groups

Today we found out our groups for the synoptic projects. This counts for 40% of our final year grade, a crucial part of our future portfolio, and would be created during a 6 month time frame. Last week we each had to individually pitch an idea for what we could do for our project based on our chosen areas, mine being VFX. You can read about that, here. Where I discuss my pitch in detail.

The Groups

To my surprise, I was placed into 2 separate groups. These being a game and a visual effects sequence. My job role is listed as “Freelance VFX Artist / 3D Artist” as seen below. This is because I am on more than one group, and can help out possibly more if needed, but will focus on those two.

Group 1 –  Jekyll and Hyde (VFX)

capture


This was an idea I initially voted for, so I am happy to be part of this group. I can help out with some of the compositing, and general visual effects that will be in this group. Including, keyframing, using masks, and possible rotoscoping if needed in the project.

Group 2 – Space Station Defence System (Game)

Capture.PNG

In this project, I will mainly be focusing on particle effects and making the game look pretty, by this I mean maintaining the same colour scheme and adding some effects at the end if needed (polish the game).

What are we doing?

For now, we are just polishing the ideas, and finalising storyboards. This is so when we start production, it is alot easier to go through with it.