Uncategorized

Synoptic Project Pitch

This week we had to present our ideas for our “Synoptic Projects”. This counts for 40% of our final year grade, a crucial part of our future portfolio, and would be created during a 6 month time frame. We had to present an idea based on our chosen areas, mine was VFX. This blog post will essentially act as a written version of the pitch, along with some minor feedback towards the end.

The Pitch

Slide 1 – The Idea

capture

The main concept of my idea was pretty simple. It was a small visual effects sequence of around 1-2mins in length. The visual effects element would be walking statues / trees with faces, some static and some that speak. As well as this, it would be in the point of view of an old wizard, or druid. You can tell this by the staff that would be in view.

Slide 2 – Fitting the Themes

capture-copy

My idea fits the themes pretty well, the three themes were:

  • A place or building of significant interest
  • A fictional character
  • Local connection to history or literature

I hit 2 out of 3 here. The fictional character being the druid/wizard in the sequence, and the building of significant interest being the Winter Gardens.

Slide 3 – Inspirations & Why

capture

To create something challenging yet rewarding was the main goal for me. If executed correctly, this could look industry standard, at college level. This would be an incredible addition to a portfolio for university or job applications. Above is also an example of a tree with a face, something that could be used as a reference image during the creation process.

Slide 4 – Job Roles capture

The main job roles within the team would consist of an ideal 2 VFX Artists, 1 Sound Engineer to work in collaboration with sound students to create a small soundtrack and some sound effects. 1-3 3D Artists would be great depending on the method of creating the trees. A voice over could also be necessary if an intro sequence is implemented during the creation process.

Slide 5 – MVP (Minimal Viable Product)

capture

A minimal viable product is the minimum amount of something you think is acceptable. For example, the MVP of my project is at least one tree / object with a fully fictional face. This means fully rigged, animated and put together in After Effects. As well as this, the flash (which I will explain later) is a piece of visual effects that is relatively simple to create, but hard to execute, I would like this in the MVP.

Slide 6 – Scope (Scalability)

capture

This part of the pitch explains what could be added if we complete the initial idea. For example, more objects could be added in, walking statues and maybe a backstory or an intro sequence to add more of a story aspect to the scene. More ideas could be added in the future, depending on how much time we have left to complete it.

Slide 7 – The Pre-Vis

This was a quick Pre-Vis I made to show of the MVP of my idea. Obviously, the finished product would be alot longer than this, It is just to show the premise of the idea and how it would work.

Feedback

I received some minor feedback from my peers and tutors after completing the pitch. Including:

  • Maybe too short?
  • Need to crack down on how you would create the trees (3d?)
  • Team size

Creating Pre-Vis (Synoptic Project)

To help with my synoptic project pitch, I decided to create a VFX Pre-Vis to give a brief demonstration of how I think my project would look. This was done in Maya/Mudbox for the models/animating software, and composed in After Effects. Here are some screenshots/gifs of the making of this pre-vis:

Screenshots

This slideshow requires JavaScript.

GIFs

This slideshow requires JavaScript.

Finished Product

8 Week Modelling Progress (Week 1)

As of last week, we started an 8 week modelling challenge to create a high to low poly model to go in our portfolio. As well as being part of this year’s modelling lectures.

Progress

Using box modelling / reference images, I have created the side panel the helmet which will go on both sides. After I have polished this model off, I will have to add some curvature to the panel to make it fit around a helmet. Take a look here:

This slideshow requires JavaScript.

What Next?

Next I will have to add some curvature to the model to make it blend in to a space helmet, when I create that. I think I will model it inwards using the same technique to save time, and increase accuracy.


Expressions within After Effects

Today we started learning expressions within after effects, also known as the “code” inside of the program.

Starting Off

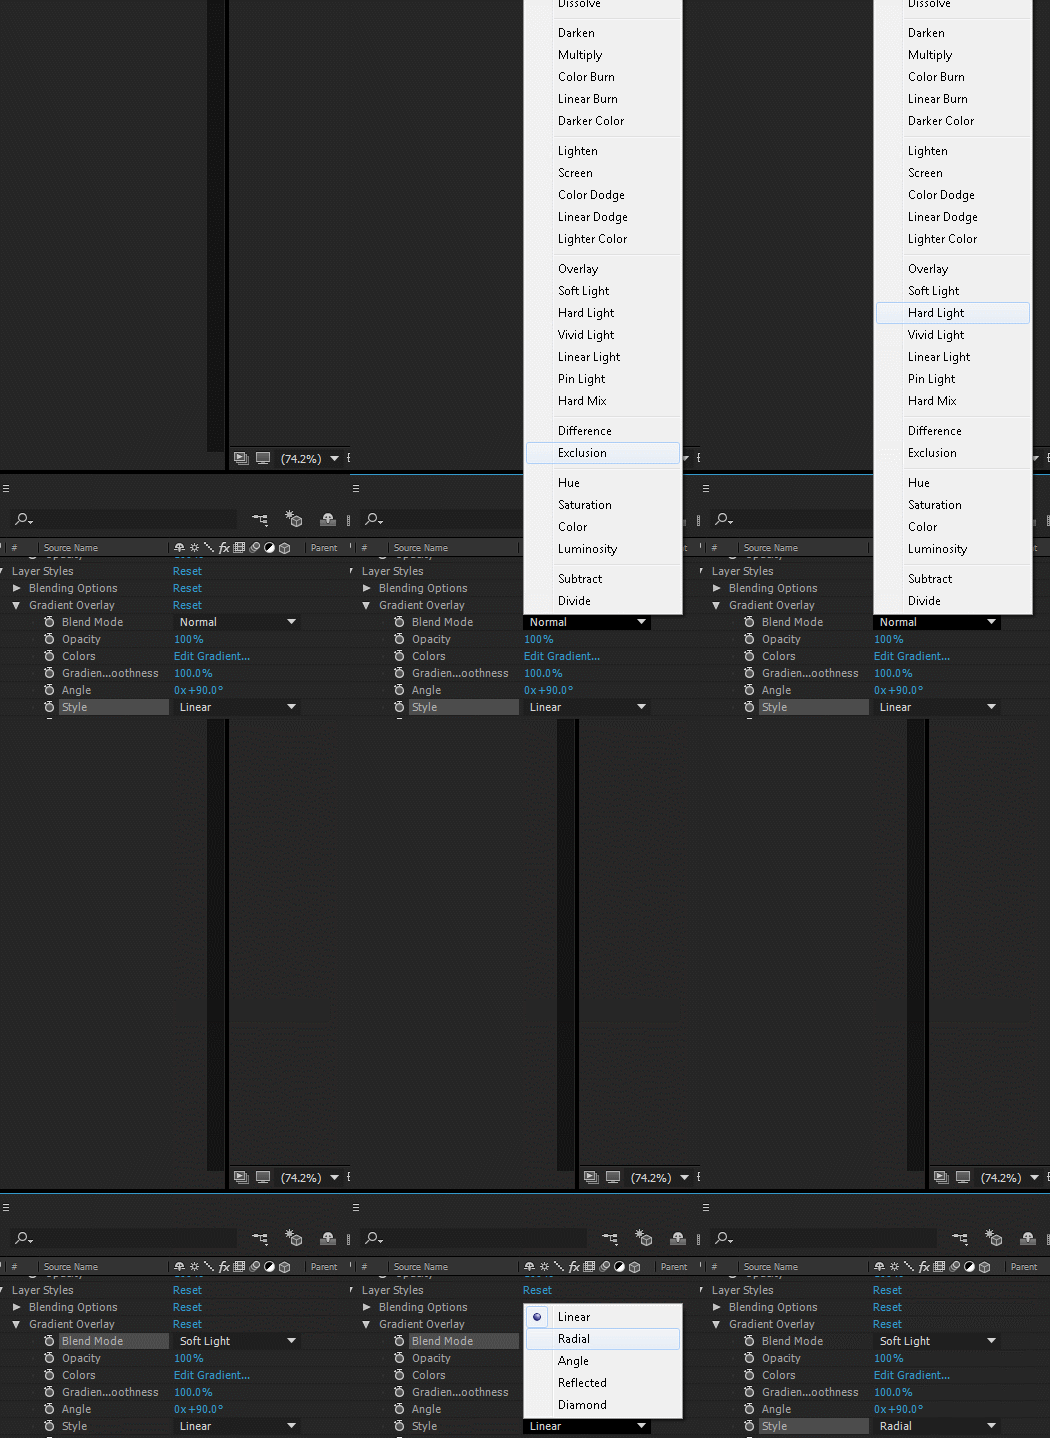
To start off, we imported a file into After Effects to get our first 2 layers. We first drag the background layer into the timeline, and add a gradient overlay. Then we change the scale to 150% to give it a better effect, and change the blending mode and style.

gif

Getting into the Code

To access the code, ALT+LMB on the animate button next to the scale layer option. And some code will appear that says “layerStyle.gradientOverlay.scale”.  If you change this text to “wiggle(8,20). It will make the gradient wiggle. It is a simple animating effect that takes almost no time.


8 Week Modelling Project

What is it?

Today marked the start of an 8 week long project to create a high to low poly model using normal maps. It was to be part of our portfolio, and part of our modelling lectures.

My Idea

It could be anything you wanted, but the essential part was that you had to make a low poly version using normal maps, and a high poly version with no normal maps. My idea was an astronaut helmet, with some modifications to it. At first, I thought about creating an entire suit, but I thought that was too much. I have decided to create the helmet/shoulders part.

Examples

Here are some examples of something similar than what I would create:

This slideshow requires JavaScript.

End Goal

My end goal on this project is to render the model out, and use reflection maps to add a similar effect to this image:

3f235c9677ce90c351688ceab82a2dd1


Framestore: Lunch Crunch

What is the “Lunch Crunch”?

The “Lunch Crunch”is an activity in which Framestore employees partake on a Friday lunchtime. It is 2 hours of modelling. Framestore have decided to set us our own Lunch Crunch challenge.

“They have suggested that students do this task on the 24th of November as it is ‘Celebrate Your Unique Talent Day’ and that could be an interesting theme for the students to interpret. We would give the students 2 hours and the only rule is that they have to start from a sphere, no pre-made models allowed.” – Brief

The Idea

Our lecturer, Matt, said we could base our model off one of our hobbies/game/film, or something we like. As we had to start off with a sphere, I wanted to create something similar to an object in a game I play.

This is a “Servitor“. It is an enemy in the game Destiny.

300px-destiny-fallenservitor

As it is a sphere, I thought it would be a good idea to start off creating this, and then add my own twist towards the end. I have merged two of the races in destiny, the servitor, and the corrupted race, The Hive.

This slideshow requires JavaScript.


I took the spikes, and glowing green aesthetic of the Hive and added it to the Servitor.

Finished Product with Paint

This slideshow requires JavaScript.


Emerging Technologies: 3D Printing

What is 3D printing?

3D Printing is the process of making 3 dimensional solid objects from a digital file/materials. 3D printing starts with making a virtual design of the object you wish to 3D print. The file is usually a CAD file, which means computer aided design. A 3D scanner makes a 3D digital copy of an object, just like a regular scanner works with 2D objects (usually paper or card).

What are the advantages?

A 3D scanner makes a 3D digital copy of an object, just like a regular scanner works with 2D objects (usually paper or card). This gives us the ability to further customize products before mass manufacturing is started. 3D printing also enables quick production of prototypes or small scale versions of the real deal. This helps researchers and engineers plan the actual object and catch any design flaws that may affect quality.

What are the disadvantages?

. The size limitation is rather severe as very large objects would require a huge 3D printer and an enormous amount of materials. The cost of one of these 3D printers is also quite substantial. It is not a purchase by the average householder by any means.

Here is a time-lapse of a user named “BusyBotz 3D Printing“, they created a Yoda model from the hit movie franchise, Star Wars.


Types of Tracking

One Point Tracking

One point tracking is used for very quick 2D tracking centered around a single point, with no warping. It is the go-to tool for motion artists, but as after effects uses contrast to find track points, you will need to ensure you set your tracker on a well-defined point.

Two Point Tracking

Two point tracking is best used with footage with mild to moderate levels of camera shake. It is great for simple camera movements, as long as there is at least 2 contrasted elements for the tracker to track.

Corner Pin Track

This is used for basic screen replacement. In order to help screen replacement easier, AE has a built-in corner pin tracker that is designed to work with any four point surface.

maxresdefault

3D Camera Tracking

Easily one of the most powerful features in the After Effects package is the 3D camera tracking tool. It autimatically selects various tracking points in your footage and allows you to select which ones to use. However, it does take a while if you have a bad computer/long footage. Check out this video from “thevfxbro” on 3D camera tracking for more details.

Planar Tracking

If the surface you are trying to track is particularly difficult to do so, then the planar tracking feature in “Mocha Pro” is the feature for you. Mocha Pro will use predictive tracking to track the position of an object even if a portion of said object, is offscreen.

Spline Tracking

This is the most accurate form of tracking. Spline tracking can track any type of shape because you manually create the tracking plane. You trace around the object you wish to track and Mocha Pro will try its best to track the object.

Image result for spline tracking

After Effects: IronClad Designs

For our VFX lessons, we have a short, simple project to create a logo for an imaginary company, and create a very basic and simple animation in After Effects. I wanted to do something with a slick, grey and black colour scheme to go in tandem with a clean look and feel.

When you think of the word Ironclad, you think of a large structure covered in metal, sluggish and heavy. I went for the total opposite of this and, like I said, went along with the clean look. Using a unique font (Quicksand) found here.  With this typeface, it comes with several different options. Displayed below:

This slideshow requires JavaScript.

Using simple animation, keyframing,  I was able to come up with this:

After getting the animation done and finalised, I added some simple sounds to give a more professional feel.

After looking back at this, I decided to make the “Designs” text align up to the hammer and chisel silhouette, make it smaller, and space out the letters. Here is the updated version:

capture

After Effects: SIVA Density Critical

A couple weeks ago I dedicated myself to learning after effects, and creating some cool visual effects / animations inside of the program. First of which was a simple effect recreated from a video game named Destiny. I am a huge fan of this game, so I decided to recreate the SIVA Density Critical effect from it.

What is it?

SIVA is an ancient, technological entity spread much like a bacterial or fungal infection. It is made of nanobots that consume, devour and take control of whatever it touches. Along with a red colour scheme, I thought it would be a good idea to try and recreate the effect. Seen below, SIVA is the red logo displayed on several monitors. Image result for siva density critical monitors

Shown here is a brief clip of what happens ingame:

Recreating this effect was fairly simple and straight forward to do. Using a free stock video I found, credit to FootageIsland.

Using adjustment layers, and displacement maps, I was able to create the simple effect of SIVA Density. Here it is:

To create the effect of different types of distortion, I changed the Max Vertical Displacement and Max Horizontal Displacement to a different, unique figure, around every 2-3  seconds. This is why some parts look more distorted and corrupted than others. As a beginner to after effects, I both enjoyed making this, and I am quite proud of it.